Friday 23 December 2022

Build in progress: Lady Zonneschut's dressingroom, fireplace and ceiling.


Hello my friends,

One of the key elements in a period room is the fireplace. Often the only means of heat and light in a room.  Until now this vital element was missing. And in a dramatic way even. As seen in the picture below it was a large white void in an otherwise colourful room.
Because the dressing room of Lady Zonneschut is a relatively small room I chose to give it a corner fireplace. With real live versions in my mind I perused my (growing) stash of bits and bobs and offcuts of mouldings to see if I could turn this fireplace into a decent 17th century model.


I did. I made a list if the pieces I needed to cut to fill up thel corner and build up the fireplace. 
I cut out a square hearth floor on which everything would be built. I cut away one corner to give it a decorative edge. 


Originaly the moulding surrounding the opening would stand on a rectangular base. You can see these rectangular pieces 2 pictures up. But these would hang over the outer lines of the hearth floor. That did not look good! So I discarded those together with the now too short mouldings for the sides. I cut 2 new pieces to span the full height of the opening. To me this looks much better. 

But I was not ready to paint yet. Between the mantle shelf and the fireplace mantle I added two brass S-scrolls. I added a few layers of card stock at the bottom and the top of the S scrolls to tie the fireplace surround together with the top moulding. These elements together will form on their turn the surround for a mirror.


I painted the floor and mantel of the fireplace in a dark indigo blue mixed with ivory black. The rest was painted in the sage green I used for the rest of this room. The mirror is a mirror foil and the frame consists of pieces of gilt Dresden paper banding. One day I may replace this with real mirror glass when I find some that is thin enough. But for now this will do nicely.


The blue elements of this fireplace will be marbled of course. The surround should look like a marble or other kind of decorative stone. Using translucent white mixed with acrylic medium I softened the dark blue. The veins are a bit rough and the brighter white dots should resemble little pockets of quarts in the marble. These soften the stark blue base coat.  Do you like it?


The bottom half of this fireplace is now pretty much finished. It now mostly needs to be filled with a hearth plate, a pair of andirons and my original plan for the top half was a number of decorative corbels to display a selection of blue and white porcelain.  But that I will make for another, larger room.  

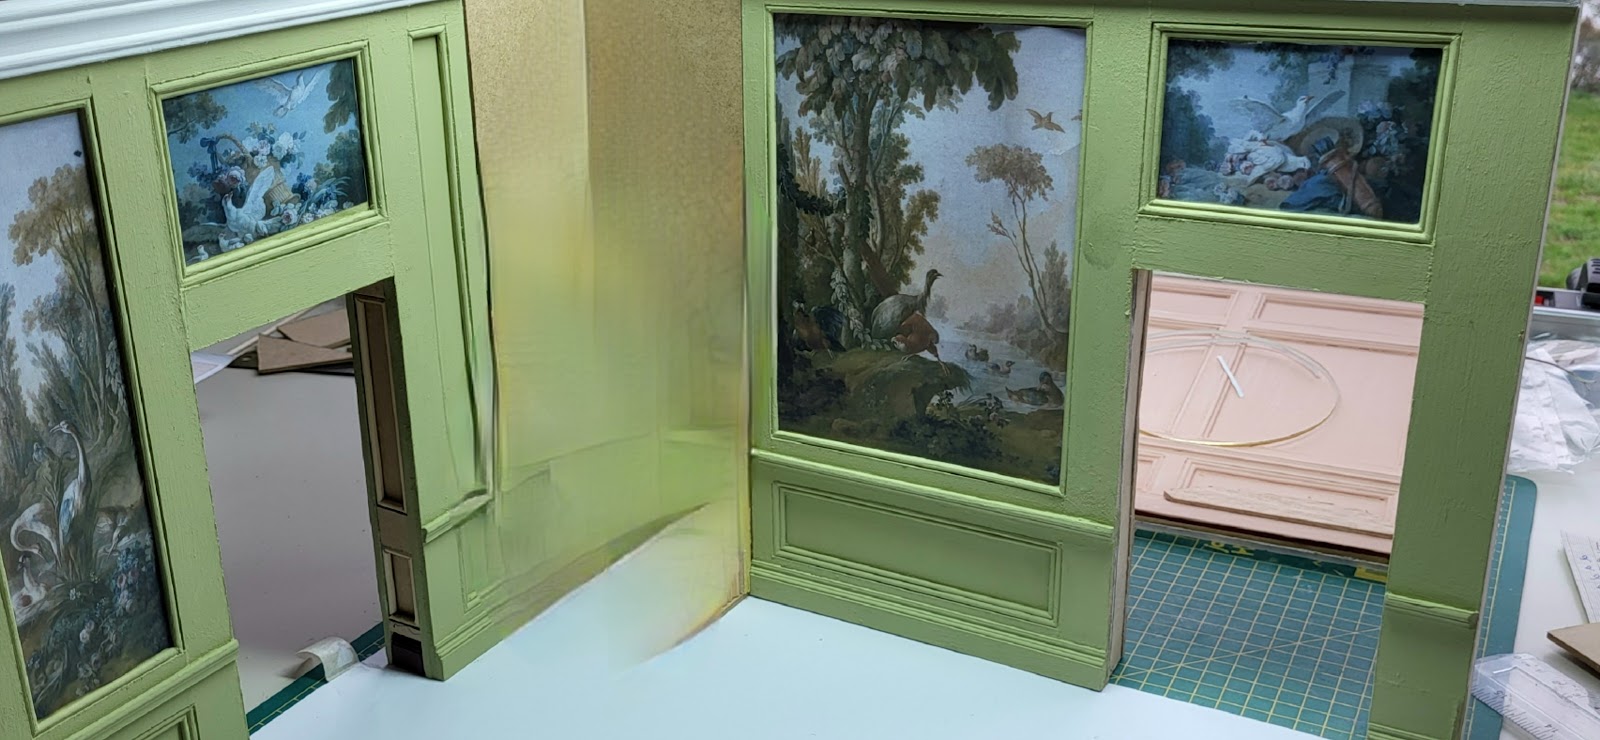
Here I want a painting that fits into the scheme of the room. I have chosen a panel of the Salon Demarteau with a statue of Cupid amidst the same foliage and roses of the putti fountains i have used for the doors of this dressing room. Here Cupid is supporting an arrow in one hand and a laurel wreath in the other while looking pleased with himself. I am sure that this painting personifies "Amor Vincit Omnia"(Love conquers all) I think that is a nice theme for this room that is the private sanctuary of a lady. 


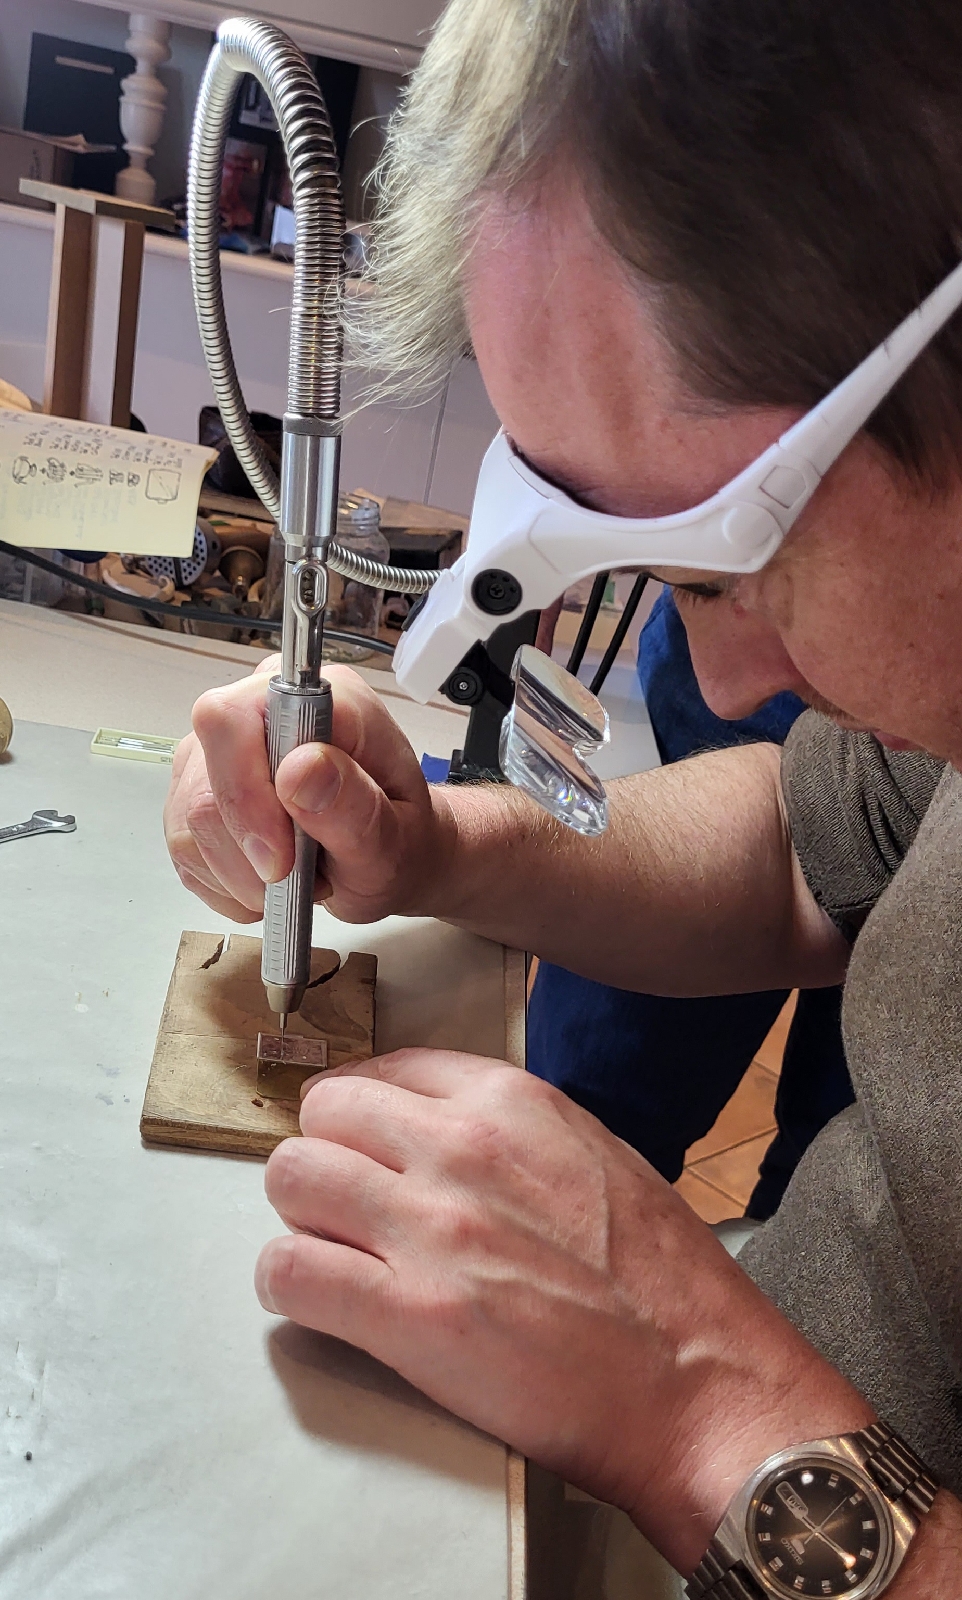
Just like with the doors I want to frame Cupid as a central panel above the fireplace to fit in the scheme of the dressing room. I cut a frame from 2 mm card stock. cut out a central panel and lined it with cut pieces of 2 mm skewers. These 4 pieces brings the total to 216 pieces of cut bamboo in this boombox! 


Then it was time to paint all the additions green, as you can see in the picture above.And with that done, it is time to turn the attention to the ceiling of this room. Originally I had planned a white ceiling for this room. Just like you can see in the picture above. White stucco ceilings with or without sculpted decorations and/or with a painted central medallion was often the popular choice from the second half of the 17th century up to the 3 quarter of the 19th century. The white ceilings helped to reflect the soft candle light, making the best use of the light of each little flame.


But with the advent of bright gas light it became too reflective. To reduce the glare and soften down the light of this fashionable new light source they started to use colours to cover up the white ceilings again. But the design I have chosen for the painted ceiling predates all that. This design is from around the year 1700.


The sage green of the walls is quite a cold colour. Together with a white ceiling it  would make quite a cool room. But I want this room to show warmth! A luxurious little room to withdraw oneself from the hustle and bustle of a large country house with family, guests and servants. So therefore I turned to another popular ceiling treatment back in the 17th century. The painted wooden ceiling. It is old fashioned and outdated in the time of lady Zonneschut but it was still very popular when the house was built in 1675. So a painted wooden ceiling it wil be!

Imagine that the original beamed ceiling is covered by planks. Hiding the beams from view. This gives a flat surface to paint. The design I have chosen was found on the internet (the site of the Rijksmuseum) and is made by Elias van Nijmegen (1667- 1755).Apart from paintings and portraits he also designed and made interior pieces like overdoor paintings and ceilings.

Because the ceiling in this dressing room will no longer be white the cornice around the ceiling can't stay white either. In period rooms with painted wooden ceilings these cornices, when present, usually get the same colour as the rest of the walls. So here you can see them in green. This changes the look and feel of the room more than I expected it would. The coloured cornice and ceiling make the room look smaller, more cosy and more late 17th century. 


Well my friends, we have come to the end of this post and at the same time Christmas has almost arrived. Only two more days. I hope that the world we be a better place for all living on it than it has been the last year.  

Just to show that it can be quite peaceful, a picture taken from my livingroom last weekend. The ice is gone now, thaw has set in to the delight of the birds and other animals. No white Christmas for us this year. But that is not the most important element of the celebration ofcourse. 

I wish you and your loved ones a very merry Christmas! Enjoy!

Huibrecht


Monday 14 November 2022

Build in progress: Lady Zonneschut's dressingroom, doors and floors


Hello my friends,

In may 2021 I showed you the last actual work done on the dressingroom of lady Zonneschut. I started work on the dressing room (or 'chambre de poudre' as the nobility in the 17 hundreds loved to us french for everything,) in january of that same year. In the Netherlands we were in lock down at that time because of Covid and I wanted a lock down project. Using materials I had lying around already without ordering new materials online. After the lock down(s) ended daily life soon took over and the build of Huis ter Swinnendael was put on the back burner. Now it is high time to resume work on this room!

The painted wall hangings in this room are copied from the 'Salon Demarteau' which is one of the period Parisian interiors that are on display in the Musee Carnavalet in Paris. As you can see the walls here are painted from top to bottom. I want to let some of the putti that adorn the doors in the salon Demarteau come back in the dressing room. 

But before I started work on the doors I should first finish the door openings where the doors go into. They still needed to be divided into panels and decorated with bamboo skewers like I did on the walls and the window opening. Besides that the door opening in the (new) back wall also needed an opening cut out of it. Because I changed the plan for Huis ter Swinnendael as a dollhouses with outer walls into room boxes within a large mahogany wardrobe this room is rotated 90 degrees and there is no longer need for a fourth wall acting as a door. 

This fourth wall was the one with the window in it so you could still look into the room when the door was closed. Now the room is turned so that a side wall with only a suggested door has become the back wall. The suggested door now has to be a real door because the discarded wall will be used as the back wall of a small room leading off of the dressing room, and visible through the yet to be cut door opening. 

The Anteroom behind the dressing room can not have the same colours and painted wall hangings as the dressing room. So the painted landscape with birds is ripped out and filled in with some mdf and cut bamboo skewers to turn it into a fully paneled wall. I continued cutting down skewers for the panels in the door openings. The total amount of the cut pieces of bamboo skewers in this room box has reached 204. (yes I counted every one of them!)

When the glue had dried I painted the wall in a coral pink to keep it light and set it off from the sage green of the dressing room. The door openings were painted green or pink depending on the place of the door in that opening.

Now it was time to turn my attention to the doors themselves. The cut-out from the back wall fits right in the door opening so that will be my door. Waste not, want not. I first printed some of the putti amidst flowers and foliage to cover the whole door. Belonging to the same room they go along the painted wall hangings well. But covering the whole door looks very bad indeed. At least it does to me.


They need to be framed as a central panel for a door to fit in the scheme of the dressing room. I cut a frame from 2 mm card stock. cut out a central panel and lined it with cut pieces of 2 mm skewers. 4 pieces per door multiplied by 2 doors, that brings the total to 212 pieces of cut bamboo in this boombox!

After the glue had dried I painted it sage green. Printed a smaller version of the putti adorned fountains, cut them out and glued them onto the door. Glued the frame over that and, "et voila", a finished door. 

Well apart from the doorknob and the hinges of course. That I will make soon in order. I have them lying around somewhere... but where? Never the less, I quite like this door, much better than the test run. Now I have to make the second door like this as well. 

With the doors covered (literally and figuratively) it is time to turn my attention to the floor. Although parquet floors were not very popular in the Netherlands until the end of the 18th century (the elite preferred wooden planking that could be scoured clean every week) I want to turn this dressing room into a luxurious little jewel box. Lady Zonneschut uses this room, apart from dressing and bathing,  as her little boudoir. And let me tell you that she is not impartial to a bit of luxury!

Therefor this exuberant design for a parquet floor with scrolls, flowers and garlands will become the exception to the rule. I will tell you right away that I will cheat here. Instead of copying this design in real veneer I use paper prints that I will varnish several layers.  

I am tempted to try and cut this floor design out of veneer, but that will be a future project. Now I want to finish this room box. Preferably before Christmas. 

Well that is it for now. I hope you have enjoyed reading this as I have of showing you this progress. The picture above also reveals the topic of my next post. If you look closely you will see something new and unfinished in it...

Huibrecht 


Sunday 30 October 2022

It is all silver that glitters! A Jens Torp workshop

Hello my friends,

The weekend after the Dollshouse Nederland Show in Arnhem I attended a silver workshop given by Jens Torp. During the three day long workshop we made silver covers for the front and back plates of a book made by Tine Krijnen. Below isva picture of the one Jens made as an example. Excuisite!

It was my first ever workshop on working with silver. I found it daunting but also very exciting to work with silver. 

It started simple enough. Two small plates of silver and a brass template. Our first job was to bend and fold 3 edges over the template. Thus creating a cover to slide on the book when finished. I messed up the first one. so I got a third plate to try again. Luckily number 2 and 3 turned out ok. So, after the necessary cutting, filing and bending I had two folded plates to work with.

Next came the soldering with silver. The corners had to be soldered shut and a short stub of silver thread had to be soldered on the long side. These would become part of the clasp later. I gave soldering a try but I could not make it work. Fortunately Jens was kind enough to help me so it turned out alright in the end. Well the soldering at least. The book covers were as yet nowhere near finished, but the first day of the workshop already drew to a close.


The second day started with designing the pattern for both covers. In its folded form the long side of both covers measure just 1 inch. (2,5 cm) This will give you an idea of how big, or rather small, the cover is. When I settled on a design for each cover it was time to draw them on the silver. I wanted a baroque design with curving vines and flowers. On the front a medallion is added which holds the coat of arms of the Zonneschut family. 

It took me a long time to decide which designs to use. But then I could finally start opening up the little silver plates. You start by drilling holes where the silver needs to be removed. Insert the thread of the jewelers fretsaw and cut out the unwanted piece. And then you go on to the next, and the next, and the next... and so on and so forth. 

When working on such a small surface with nothing but curvy lines it takes a very long time before you have finished one side. And even longer for both sides. Because the silver is thin and not as hard as brass, cutting around end pieces means that you have to saw carefully and slowly. You do not want to bend the material or damage it in any other way. So you cannot rush this stage.


When the sawing on both of my pieces was (finally) finished, the third day had already started! Now it was time for me to engrave the lines of pettals and such. This gives the design detail and depth. Great to do but hard to master. Making curved lines has been very hard to do. Stil I have a lot to practice before I have mastered this.


But if you think that was tough to do... We then had to cut away the middle section of the silver bars on the covers. Jens provided us with a ready made clasp that should go between these. But to turn this into a hinge, meant drilling through the little round bars so a thread could be pulled through. This meant drilling with a drill measuring 0.6 mm in diameter.... 

Luckily, Jens helped the faint of hearts... I was one of those. I am bad at drilling straight. and the margin of error is extremely small here. Next time I must try it myself, just like I will try my hand at soldering again. I must be able to master it in the near future. 


And here you can see the holes cut by Jens, turning the small silver bars into hinges. Silver thread was threaded through them and tapped with a jewelers hammer to flatten and broaden the ends so they can not fall out of the hinge.


The last task that remained now was to add a pearl trim around the decorations and polish the silver. Smoothing away the rough edges and make the silver shine again. However, I had run out of time!

Luckily, Jens wanted to help me out by adding the pearl trim. This was the third time he helped me out! I would find a way to polish the silver myself. There must be a jeweler in my area that would help me out. A friend of mine, who also attended the class, stayed the evening there and would take my bookplates home with him. We would then meet up later in the month to hand them over. 

We did so while visiting Slot Zuylen, a castle near the city of Utrecht. I will show you its lovely interiors in a next post.  And finally the book and the silver covers are united. 


I love the result! I am very happy with them although there are a few mistakes made that remain visible. It is my first miniature silver piece. Handmade by me and aided by Jens Torp. I can assure you that it will not be my last! Hopefully next year there will be another miniature silver workshop. 


There is even video footage of the workshop itself on YouTube! Josje (Make Miniatures With Josje) attended the workshop as well and made a nifty bookcover herself. You can see her vlog about the workshop here. I even have a little guest role in it! 🤭
I talked with her about a mistake I had made while engraving, unoblibious that she was shooting footage for this episode at that moment. So, if you want to hear my voice, here is your chance. 😅

Well, that is all for now. Stay safe and until my next post. 

Huibrecht 


Friday 21 October 2022

Treasures from the 2022 Arnhem fair


Hello my friends,

In my last post, about the book chest of Hugo Grotius, I told you that it was my star buy of the DHN show. The dollshouse fair in Arnhem. It was the first show since march 2020 due to Covid. But you may have guessed that it was not my only purchase.

I splashed out on this little table! It is made by Yosh Sagi who is a superb craftsman. A true collectible. Every joint is dovetailed and the parquetry veneer is faultles. Yosh told me that the carcass of the table is made of cherry wood. Pear wood, palisander and sycamore were used for the parquetry. With the pear being the lightest, and the sycamore the darkest of the three.

From Elisabeth Elsner von Gronow I bought this collection of Dresden paper. The big squares can be broken up in small triangles and used in different ways. Dresden paper is very detailed, and the fact that it is paper makes it pliable and easy around corners. I have seen them used to form or enhance frames around painings and mirrors. But also as stucco or caring on wooden panels. 

I want to use most of these for the decorative Rococo plaster trim on and around the stucco ceiling of the small salon.


This book was bought prior to the show. But I did not yet show it to you before so I decided to do so now. The book is made by Tine Krijnen in cooperation with Jens Torp who supplies the intricate lock for these. 


New for me was Miniatures by Vio. They sell laser cut sets. A lot of different designs to choose from. They have a lot of art nouveau designs and some mid century furniture too. And a large array of gothic windows to choose from.  Most stuff is too modern for my projects, but nicely designed and made.  

I chose two stools that do fit my chosen era. One for downstairs and one for upstairs. I will probably not use the wavy gold trim supplied with the kit for the 19th century footstool. I think that is a bit too big and coarse. But the design is similar to several renaissance stools I have seen and not typically 19th century in style.

Next is a painting of Maria de' Medici as a little girl. Daughter of Cosimo I, grand duke of Tuscany. The original was painted in 1553 by Agnolo Bronzino. She is not thé Maria de Medici that would become the Queen of France as wife of Henri IV. Thát Maria was born in 1573, 20 years after this portrait was painted. 

This Maria was the aunt of the  future queen of France. She was engaged to Alfonso II, Duke of Ferrara, but died at the age of seventeen, before the marriage could take place. It was usual to commission copies of portraits of members of ruling families to hang them in their several palaces or to send to allied families as gifts. Or to present children to other families as mariage candidates...

Carel Polyander, or one of his ancesters who also had undertaken a 'grand tour' to Italy, could have bought it in Ferrara. Since she never married the Ferraran duke (he got Lucrezia de Medici, a younger sister of Maria instead) this copy was of little importance to a Ferraran aritocrate to have on his wall. And that may be why this Italian portrait found its way to a large Dutch country house. But now back to the miniature. itself

This miniature version was painted by Atelier Valckenier. I love this portrait. I do not feel that the plastic frame befits this portrait. It simply does not do it justice. stylistically the frame is of a different period and too modern. I will replace this some day with a frame in the renaissance style. Luckily the existing frame can be removed easily without any danger for damaging the painting. 


And last but not least, Hugo Grotius' book chest made by Hetty Fromme. But you can (or have) read all about that in my previous post dedicated to this piece and the history attached to it. 

So my friends, that's it for now. My assembled treasures from Arnhem. From now on the Show will only be once a year. A pitty on one hand, but on the other hand that gives me double the time to save up for it!  ;-)

Huibrecht