Friday, 2 April 2021

Supplying the office: To put your stamp on things...

Hello my friends,

Can you upcycle an already perfect miniature? Perhaps not. Or at least the word upcycling is probably wrong in this context. So let us simply call it personalising.

Sun of Nalladris added a box with sealing wax and a stamp and all that is further required for sealing letters with wax to her webshop. I immediately fell in love with it.

Moreover the box comes with a tiny personalised lasercut monogram in silver stuck on the lid. The same monogram (but even smaller) is etched into the sealing stamp. I find that só cool so I wanted to have one of those boxes. I happen to know Sun from the miniatures fairs in Arnhem so I called her up asking to buy one of those boxes. 

We had a lovely chat about miniatures in general when I told here that I (the idea had just sprouted in my mind that same minute) that I would want to try to decorate the box with some tiny chinoiserie scenes. She loved the idea but told me that for that it would be much simpler if she would leave the box unfinished and just provided all the elements. That way I could decorate them and put the box together just the way I wanted.

So now I was left with actualy decorating the box myself. Me and my big mouth! :-D

When it arrived I was thrilled. Every piece is so tiny! As a little gift she added two more stamps saying that in the office or library of Huis ter Swinnendael there would always be a place for a couple more. If you read this, thank you again, Sun!

It was time to get to work. I painted the outside bright red and the inside light blue. It needed a few thin coats before the woodstain stopped shining through. I lightly sanded the outside to smoothen the surface.

I have collected various pictures of japanned furniture. I used them to find a few scenes to recreate on the box. I had to leave some room for the monogram.

First I painted some basic forms in black and let that dry. Then I added gold paint on top of that to add details. The black that remains vissible adds some shadows and depth to the tiny pictures. I added scenes on every side of the box. When those were finished and dry, I glued the silver monogram in place. 

I also painted the handles of the stamps and the mini crucible to melt the sealing wax in the same red or blue. I decorated the handles with a simple gold flourish. Then I varnished each peace inside and out with glossy varnish to give it a proper lacquered appearance.

When that was done I added the hinges on the box and lid, as well as the tiny tiny brass bead on the drawer for storing the sealing wax. It took me a few days to get to this stage, but I really like how it turned out. I hope that you do too!

This box could go into sir Zonneschut's library but it will get pride of place on the desk of the steward in his office. 

Sunday, 7 March 2021

A miniature gueridon tutorial: 3. Finally a pair.

Hello my friends,

It was high time to finish this miniature gueridon and let this little statuette join with its little counterpart. Because let us be honest my friends. It is a little weird for the little chap on the right to dance into perpetuity without having the little chap on the left beside him making the music to dance to. 

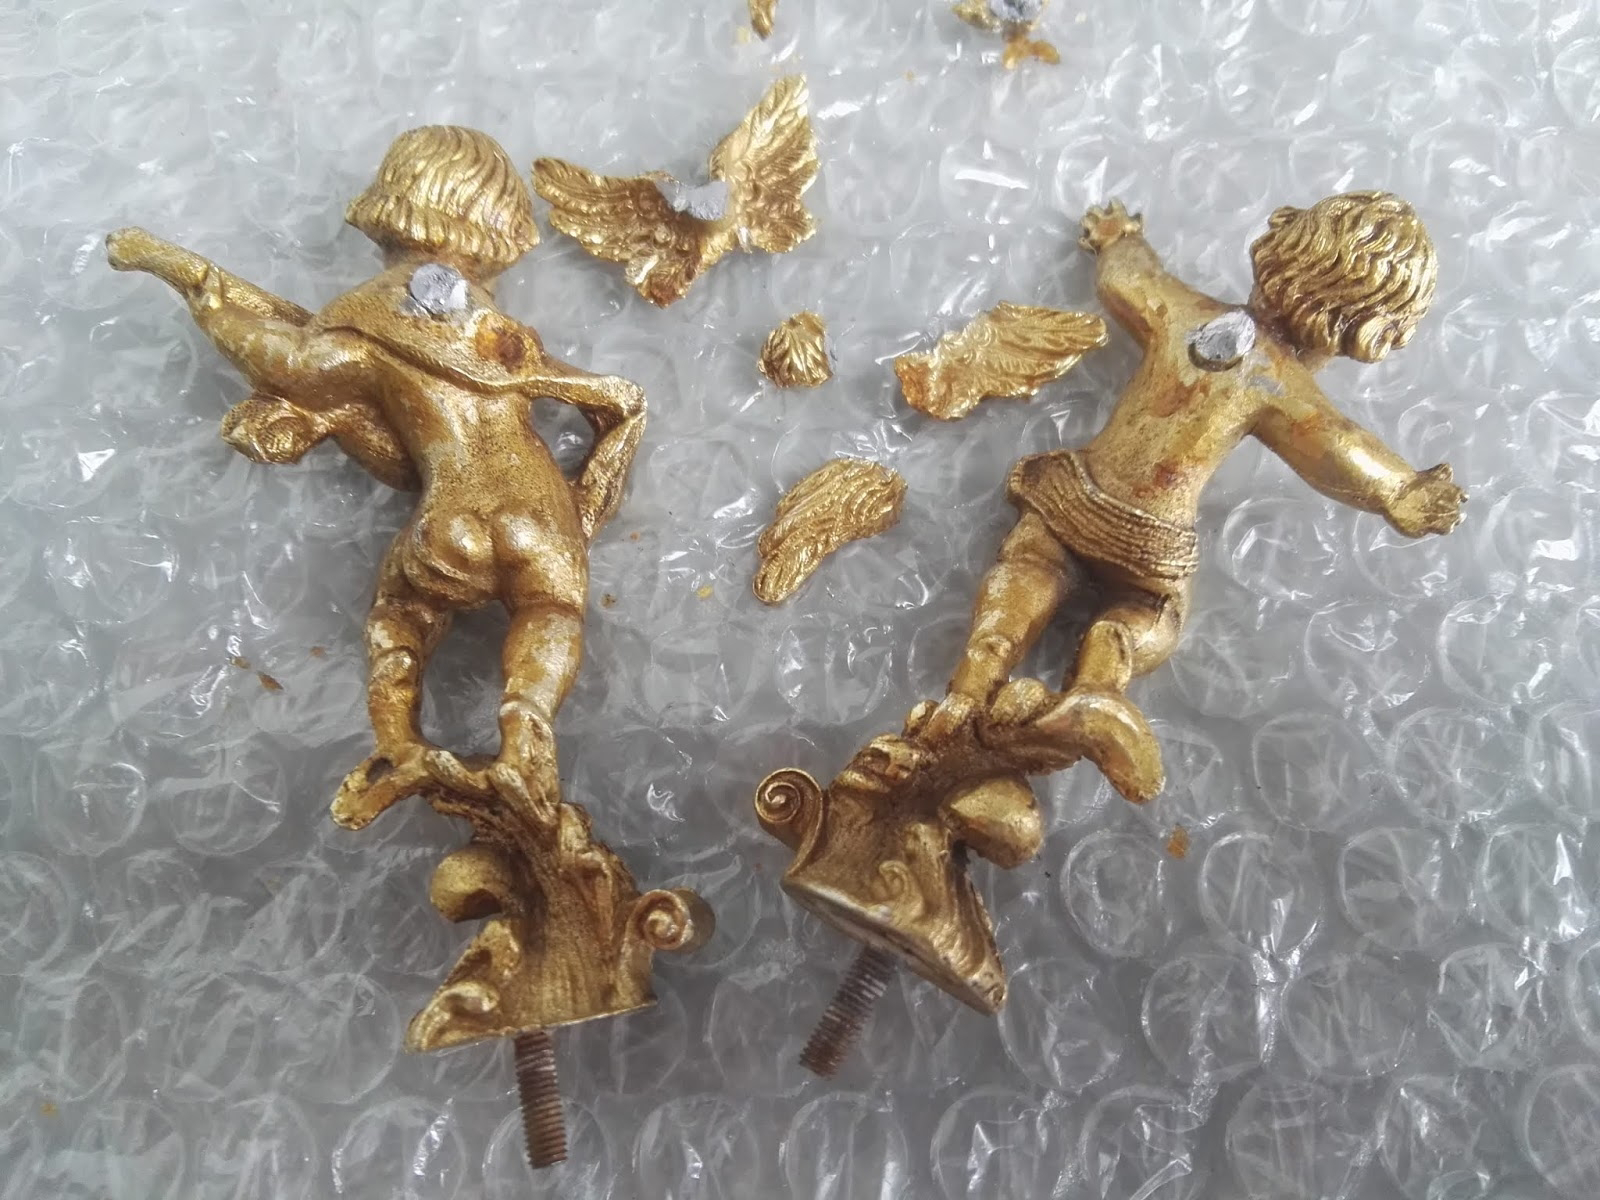
And I started back in august 2019! So it was high time to reunite these two boys. The picture below shows you what these ornaments to adorn a clock really looked like...


But when I took all  the components out of their box, the white and grey faux marble on the already finished plinth looked a bit too obligatory in my mind. I had to redo the plinth anyway to make sure that the paint finish on both plinths would match exactly. 


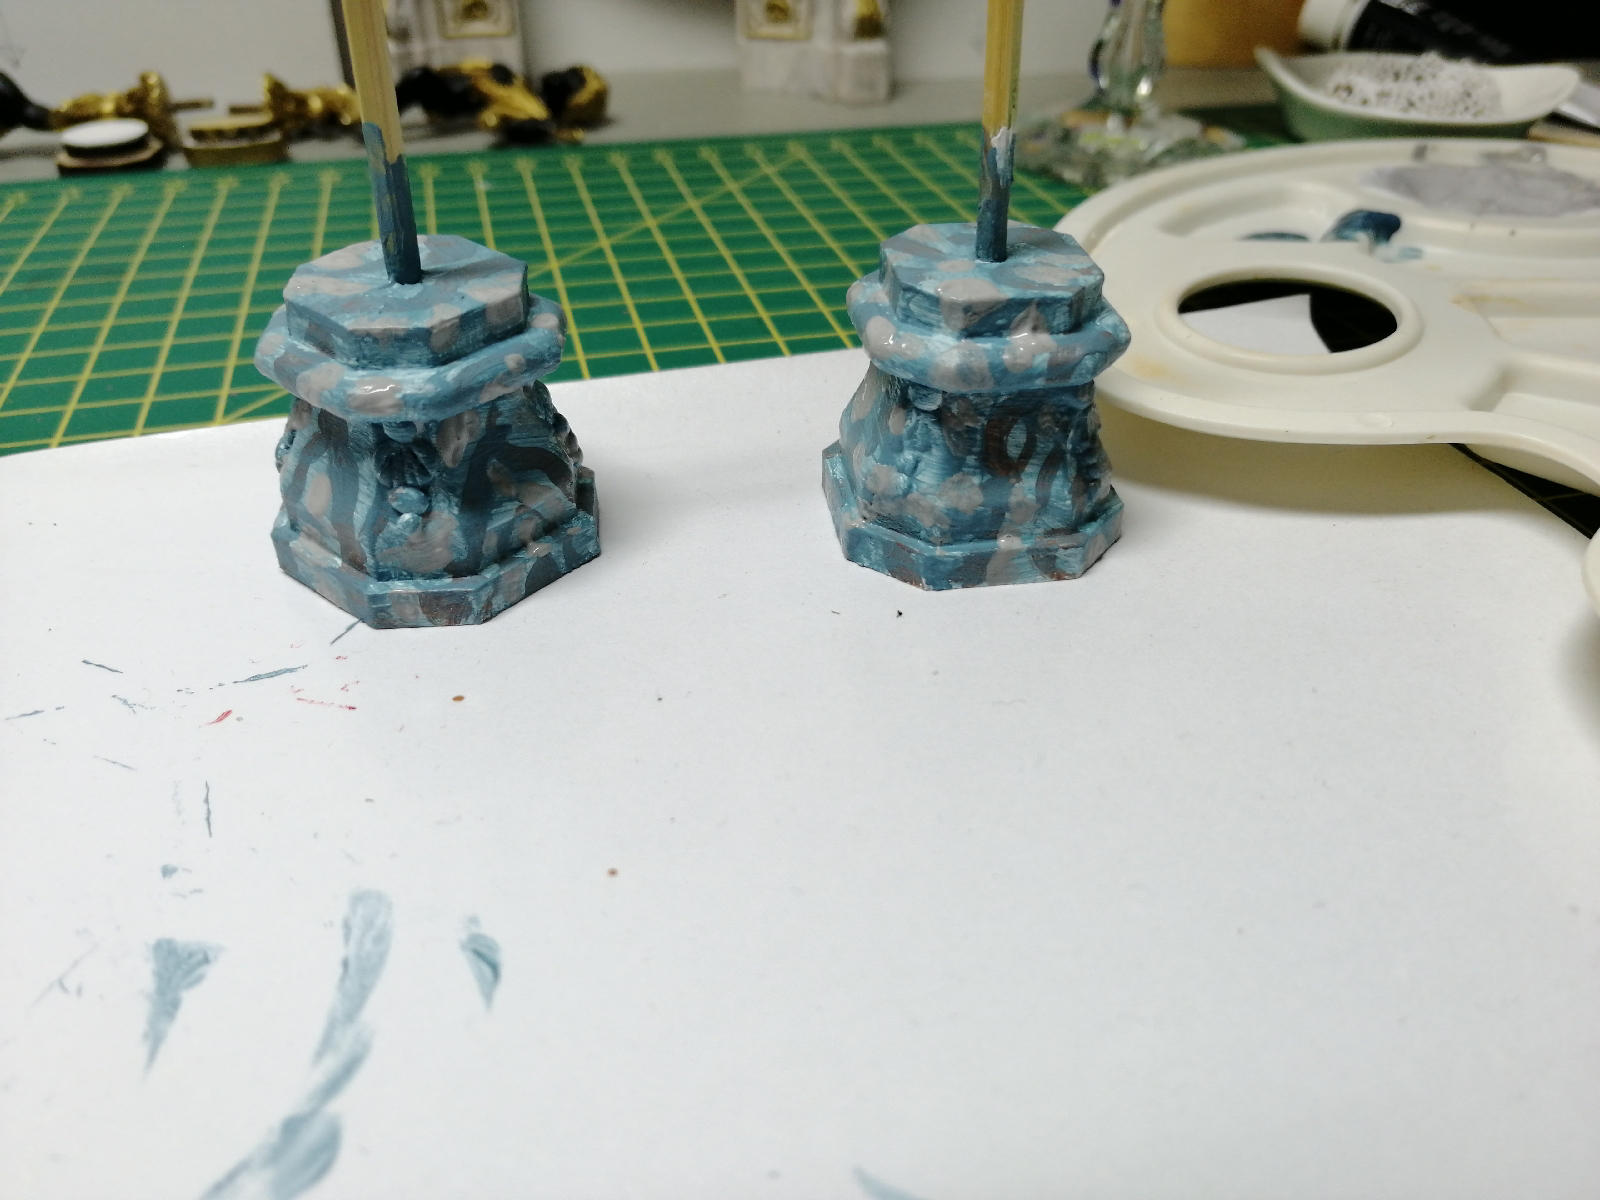
There I was, working away on the second gueridon when I got stuck. The paint effect that I wanted to achieve on both plinths did not work. However I tried it could not get it to look the way I wanted. Sad but also a valuable experience. The photo beneath was only half way the different paint layers and meant to be this coarse. The following layers did not bring the result I expected. And I had stopped making pictures. ;-) 


And as if that was not enough already...  As I looked again at the two plinths I realised that there was something off about them too. And it was not the miserable paintjob. No the rounded border on top of it was way to large for the part underneath. To excagerate it, it almost looked lik a small tabletop on a fat single leg than on the base for a statue. 
I compared it to the sketch I made of it. You can see it in the picture above.   Now I spotted the flaw. I had shaped the sides of the plinth differently from the design I had made. But the wooden disks I had used did correspond to the original drawing. So in effect the end result (structuraly) was an amalgan of two different types of plinths. And that is why it looked odd, if not to say wrong. But hey, mistakes are there to learn from, right? Right. 

Had I finished the paint job, and would that finish have been as intended, I might choose to ignore it. But it had not. And I could not... So I decided to take it all apart and start over. In the last post on the first gueridon I already said that the crown for the gueridon, to place a vase or candlestick on, was to big and clumpy in relation to the little statuette. So why not deconstruct that as well? 

So I did exactly that my friends. I took a craft knife and cut and peeled away all the fimo and paint that offended me. It really is to much to say that it made me feel better, but returning them to a somewhat blank canvas was very satisfying. I also deconstructed the crown. I cut away the fimo and seperated the two wooden disks. Round disks with a smaller diameter should be used under the octogonal plateau to make it less clumpy. 

I got out some fimo clay and sculpted it around the plinths once more. Now the new shape was going to be hollow/concave again but now arching out both at the bottom ánd the top. I baked it in the oven so that I could start painting it as soon as possible.

 I was done with faux marble for now. My intention was to give both plinths the look of old and unpolished silver and add some decorations in gold. I believe that to be (perhaps) an unusual but good companion for the blackened bronze and gold statuettes on top of them.

The plan was to add a bit of silver paint to the gunmetal paint. But unfortunately all the shops are closed as a measure against  the spread of covid. Due to this lockdown I can not buy silver paint. I do not want to wait two more weeks (and probably longer if the lockdown measurements are prolongued) so I used the unmixed gunmetal to paint the plinths. When that had dried I drybrushed some black onto it to emphasise the silver being unpolished. It was my first attempt at dry brushing and it has been a good practice. 

And yes, in case you are wondering... Since one has an instrument and a whirling sash around him, and his dancing buddy has to make do with just a loin cloth... I believed that he deserved a little extra. And that explains the gilded nipples. ;-) 

I did the same with the crowns on top. Merely adding decorations and details in gold paint to give it some contrast. I replaced the round disk underneath the octagonal disk with one that has a smaller diameter as planned. This gives more room for decoration without becoming too massive. But before decorating them I drilled a shalow hole in the round disks to make it easier to place them on the heads of these little chaps. Originally I had added an extra ring of fimo to mould it on top of the head but I wanted the crown to be smaller and a bit more elegant than the previous one. 

After the baking and painting it was time to assemble them. I screwed the statuettes in their plinths and glued the crowns on top. After the glue had dried I made some last retouches with the paints, et voila! a pair of exuberant and Baroque gueridons. 

Well that is it for now. I hope that you have enjoyed this post. I am glad to have deconstructed them when it did not work and to start over. If I had not, the result would have been something I would probably have hidden half and half behind other miniatures. Now they will get pride of place in full view. 

Huibrecht 


Friday, 26 February 2021

Birthday treasures

Hello my friends,

I celebrated my birthday this month. And when I look back at the year that has passed, it has been a year like no other in so many ways. I hope and believe that a lot has changed for the better when I celebrate my next birthday. 

And because of that there has been no party with friends and relatives. Just some cards, mails and phonecalls. I cherish all of them but it is not really the same as getting together. However, it is for a good reason. The sooner we have ended the pandemic together, the sooner life can return to normal. That will be the biggest and best gift for me and all of us! 

For a few years now my wishlist is narrowed down to certain miniatures or a contribution towards buying them. Throwing the 'loot' for Sinterklaas, Christmas and my birthday together has resulted in quite a big haul! It does not compare to spending time together with loved ones, but I am very happy with the gifts I received or could buy with the sum received. 

First I received an octogonal burr wallnut teacaddy made by Malcom Hall. I love his work but up to now I had none of his miniatures. This single compartment teacaddy is one of my favorite models that he makes. 


The amount of detail is stunning. When you open the outer lid you can see an inner lid made of of mahogany. And when you lift that, the container for tea is 'tinned' like the originals were and sometimes stil are. 

I also got a white metal bust Louis XIV by Andrea miniatures. This company makes models for military miniatures. They do not cater to the 1:12 market. 

They do however sell a miniature version of the famous Bernini bust of Louis XIV, the Sun King. And with almost 7cm height it would stand around 84 cm in 1:1. That is large but still realistic for a bust. 
I look forward to painting this one to resemble terracotta like I did with Marie Antoinette a little while ago. 

Boule arch top mantle clock by Keith Bougourd of Small Time miniatures. My first miniature of his hand as well. I love his clocks and I want to save up for some more in the coming years. A house simply needs more than one clock! 


This clock replicates the Boule work with inlay of brass and (faux) red tortoise shell. The style of this model is Louis XVI. This mantle clock will get a place on the mantleshelf in the diningroom. 

Next are the pair of two Gustavian/Louis XV console tables by David Iriarte.

I am so very happy with these. I cannot begin to tell you how I am in awe of his talent. These are metal casts of the master piece he has made and he has painted them in these lovely light colours. I love the marbling of the table tops as well. So finely done, that I will try to replicate this on another miniature. 


He also makes unique pieces. Those are spectacular, but far out of my reach. Oh well, I am over the moon with these two console tables. And to my surprise there was more in the little White box...

As a present, David included these two candelabra as a gift. I completely missed them when I first unpacked the tables, so I only found them a week later when I took out the rest of the packing paper to rewrap the tables. These baroque candlesticks are lovely and I will have no trouble finding a suitable place for them in Huis ter Swinnendael. I have thanked David for this lovely but unexpected gift. 

And if that was not enough, a silver fruit basket by Marie-Louise from Small Scale Miniatures. The picture above is of her website. We agreed that she would keep the item until she has made a little commision that she accepted from me. But I will keep that item secret until she has finished it and has sent it to me. And until then I will have to wait on this basket too. ;-) 

And as if with all those wonderful miniatures I have not been spoiled enough already, I also received this set for gilding miniatures with leaf metal from my loved one. I am very happy with this present. I am wanting to try my hand at gilding for a few years now. But I held back for fear of it being perhaps too difficult to do. So receiving this starterset is a great reason to finally start experimenting. No more excuses! 

Huibrecht